Thursday, February 28, 2013

Black Pearl

The Zoya Pixie Dust manicures continue today with Black Pearl.  This post is going to be brief because after caring for my nieces and nephews, who have been down with the flu, for the past week it has finally caught up to me and now I have it too.  Without further ado here is Black Pearl.


I've been meaning to share with my readers my excitement about stumbling across the premiere issue of a consumer nail magazine called Nail It!.  What was also very excitement about the release of the magazine was that there were free nail wrap samples from Kiss inside.  Before this I had been quietly sitting on my soapbox thinking that nail wraps are for cheaters, but since I received a free sample I had to try them out, right?  While I can't say I'm totally sold on the idea of nail wraps, they can add a beautiful punch to a simple manicure.  

And then yesterday as I was thoroughly scouring the nail section at my local drug store I happened to come across the exact set that the nail wrap shown here came from.  So, I had to pick it up, right?  I mean I couldn't just walk away, could I?  So, you may see a few more manicures using Kiss nail wraps in the future.  The biggest downside to using them is that they don't last long.  
By the end of day one my wrap was beginning to peel up.  So, don't expect to get long wear out of them if you give them a try.

Back to the Black Pearl manicure - I started with three coats of Zoya Dahlia on four fingers, and the Kiss nail wrap on the fifth.  I added some three dimensional dots using half moon pearls.

What do you think of nail wraps?  Have you given them a try?

Keep painting, Pretties!

Wednesday, February 27, 2013

Red Racer

This awesome design was a suggestion from my super-awesome, car-minded fiance.  


On each finger I started out with three coats of Zoya Chyna.  Once that had completely dried I taped off a stripe on my ring finger and used two coats of Zoya London.  To give the design a sparkly, high sheen like a car I used two coats of Essie Good To Go top coat.

This is a relatively simple design that looks very sleek.  Thanks to my favorite person in the world and love of my life, Jeff, for the inspiration.


Tuesday, February 26, 2013

London Rain

As I mentioned in a previous post I had a lot of fun coming up with manicures using the Zoya Pixie Dust collection.  For this look I used Zoya London with two of my favorite purples - Splash of Grenadine, and Pilates Hottie.  I also did some stamping and because I was being impatient the stamp smeared a bit when applying the top coat, but I quite liked the effect and aptly named the manicure London Rain.


As was the case when I swatched Zoya London the color is coming out very green in the photographs.  I did do some color correction in Photoshop but it is still showing quite a bit more green than it is in reality, so you're going to have to use your imagination. :-)  On my ring finger I started with two coats of Essie Pilates Hottie, and on my pinky I used two coats of Essie Splash of Grenadine.  Both my ring finger and pinky were stamped with Pueen plate 04.

More Pixie Dust manicures to come in the following days!  Toodles for now, Lovelies!


Monday, February 25, 2013

Zoya Pixie Dust Swatches pt. 2

Here is the remaining swatches from the Zoya Pixie Dust Special Textured Edition.  I am still so in love with this collection of polishes!


London, the dark grey is also amazing.  I have been so into grey polishes lately and this one adds a fun new texture and color to my collection.  The swatch photos of London were coming out quite green, so I tried to correct the color in Photoshop, but it is still showing a bit more green than it is in reality. 

Chyna, the red, is to die for.  I'm not much of a red polish girl (out of my 150+ bottles of polish I only own two reds), but this red could easily make me a convert.  I really like Chyna in the intended matte, textured finish but it is also beautiful with two coats of shiny top coat - think ruby red slippers...gorgeous!

Finally, the black, Dahlia, goes on darker than London but is not a true black, because the texture catches highlights, and the glitter picks up glints of light.  It reminds me of a gun metal look, which I've always been a fan of.


As I've been working on the swatches I have also been working on fun manicures with the Pixie Dust collection.  I can't wait to share them with you over the next few days.

Sunday, February 24, 2013

Zoya Pixie Dust Swatches pt. 1

I have been very intrigued by all of the new textured polishes coming out lately, but sadly I haven't been able to try any of them because they are always out of stock at my local Ulta or not available online, until now!  When I saw a press release for the new Zoya Pixie Dust Special Textured Edition I knew I had to have it.  

I received the full collection a few days ago and wow - I am in love!  The Pixie Dust collection is a beautiful array of textured, matte, and ultra glittery polishes.  Truth be told I was a bit skeptical that they were really going to be glittery, but boy was I wrong!  They really are every bit as glittery as Zoya claims them to be.

Here are swatches of the first three colors, Godiva, Vespa, and Nyx.  I used three coats of each.  


As instructed by Zoya, I allowed each coat to dry completely before applying another coat.  Also, to maintain the matte, textured look you don't want to use a top coat.  Zoya suggests not using a base coat with the Pixie Dust collection in order to achieve maximum texture, however I have not done so as I never put colored polish directly on my nails.  Despite not following their suggestion on not using a base coat I don't feel that it has done anything to hinder the texture of the polish.


I will post swatches of the remaining three polishes in the Pixie Dust collection in the next few days!


Saturday, February 23, 2013

Purple Gradient

If you haven't noticed I love gradients, and well, I also love purple, I mean REALLY love purple.  And since I love purple SO much it means I have a huge selection of purple polishes and can actually achieve a full gradient of purples - no cheating with white and black!


For this royal manicure I used two coats of the following (thumb to pinky) - OPI Gift Cards For Everyone, Zoya Yasmeen, OPI Dutch 'Ya Just Love OPI?, Zoya Lotus, and China Glaze Light As Air.

Have a wonderful weekend, Ladies!

Friday, February 22, 2013

Galaxy Nails

It seems that all of the nail bloggers out there have done their own version of the Galaxy manicure and I am no exception!  I have come up with several different variations but this one is by far my favorite.


For this look you will need a dark base color, 2-3 colored glitter polishes in a clear or sheer base, one subtle silver or gold glitter polish in a clear base, and a piece of textured paper towel (like Bounty).

I started out with two coats of OPI Russian Navy on each nail.  After that has completely dried take your piece of paper towel and cut it into small squares (roughly 2"x2") 

Take one square of the cut paper towel and fold it into quarters, select your first glitter polish, wipe off most of the polish into the bottle, and swipe what is left on the brush across a small area of the paper towel.  Then use the paper towel to dab the polish onto you nail.  Repeat this process for each nail, and with each of the colored glitter polishes.  I like for my Galaxy manicure to be different and random on each nail, much like different parts of the sky.  To achieve randomness dab the glitter polish onto a different part of the nail each time and also vary the orientation. 

The colored glitter polishes I used were OPI DS Opulance, OPI Fresh Frog of Bel Air, and OPI Sprung, which were all topped with a coat of China Glaze Fairy Dust.  To add a little extra I used some rhinestones, and iridescent nail decorations on my index and ring fingers.


Would you like me to post some variations of the Galaxy manicure?  Get cosmic with your nails, Cuties!


Thursday, February 21, 2013

Pop Flowers

It's been a dark, cold, and snowy week in North Dakota and I don't image it will end for another several months.  I can't say I really mind the weather, in fact I love the snow, but who doesn't need an uplifting manicure from time to time?  For this design I knew I wanted to play with fun, bright colors, but I didn't have anything else pre-planned.  I'm so pleased with how this turned out and think it could be recreated in a myriad of colors.

 
I started by using my tried and true favorite color combination pink and green.  The pink I used is China Glaze Sugar High, the green is OPI Don't Mess with OPI.  For the center of the flowers I used a regular round rhinestones and the petals came from this set of decorations.

I hope this manicure will inspire some day brightening manicures for my beautiful readers!

Wednesday, February 20, 2013

Green Gradient

Since adding 3 dimensional decorations and stamping to my bag of nail tricks it's been hard to go back to designs without adornments, but who doesn't love a fun gradient?  And who doesn't love green?  Not me!


I started out with a basic black (Essie Licorice) on my thumb, and white (Essie Blanc) on my pinky.  Essie School of Hard Rocks went on my index finger, OPI Thanks a Windmillion (one of my favorite colors of all time) on my middle finger, and China Glaze Re-Fresh Mint on my ring finger.

Simple and beautiful.  Have fun with gradients, Girls!

Tuesday, February 19, 2013

Black Tie

As I mentioned before I am staying with my sister-in-law, nieces, and nephews for an extended time in North Dakota.  My niece, Anavah, had a speech tournament on Saturday and wanted a "more conservative" manicure than her usual punky look.  Together we came up with this spiffy look, suitable for a black tie affair, which I recreated on my nails.


On my thumb, index, ring finger, and pinky I used two coats of OPI Oy-Another Polish Joke! topped with a coat of Butter London West End Wonderland, which I first showed here.  I'm so in love with this combination!  On my middle finger I used my ever favorite Essie Licorice.  For adornments I used a gold bow and two black metal studs, both of which I got with this set of decorations.

What are some of your favorite manicures for dressy occasions?

Monday, February 18, 2013

Mod Dots and Dotting Tutorial

Since arriving in North Dakota it has been challenging to keep up with my posts.  The kids were out of town for the weekend so I took the opportunity to crank out 6 manicures yesterday!  Now I just have to type them all up, which is my least favorite part, but such is the life of a blogger.  But really if that's the biggest problem in my life I have it pretty darn good - and I do!

I had been planning to post a dotting tutorial in the future, but one of my lovely readers requested it a few days ago, so here it is now!  I love dotting because you can do so many things with this technique.  For this tutorial I did a gradient of multicolor, multi-sized dots.  I hope this helps in your dotting endeavors.

To start out with I used two coats of OPI Birthday Babe on my thumb and pinky, two coats of Essie Blanc on my index and middle fingers, and two coats Essie Raspberry on my ring finger.

  
Next, I gathered up my supplies.

Most importantly you'll need dotting tools, which can be purchased from Amazon at a very reasonable price here.  You will also need a cotton pad soaked with polish remover or acetone for cleaning your dotting tools, a non-absorbent surface (plastic plate, scrap glass, etc.) to drop polish on, and the polishes you will be using for dotting.  I used Zoya Kelly, OPI Birthday Babe, Essie Licorice, and Essie Raspberry.

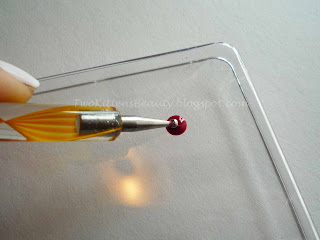
Now we're ready to start dotting!  Take one of your polishes and deposit a drop of polish onto your non-absorbent surface.
Select a dotting tool and dip it into the drop of polish.

Immediately dot the tool onto your nail in the desired location.  When doing a dotting gradient I always start with the largest dots at the tip of my nail.

When you first get your tools take some time to play with dotting on a piece of paper.  By experimenting on paper you can perfect your technique...  It's true what they say - practice makes perfect!

Here is a shot of my nail after the first few dots.

...and after a few more.

Here's the final product!


I used Pueen12 to stamp my index and ring fingers.  And I added a little sparkle to my thumb and pinky with China Glaze Fairy Dust.

Dot, dot, dot, Darlings!

Sunday, February 17, 2013

Pilates Hottie

I absolutely LOVE it when people ask me to do their nails!  Yesterday my sister-in-law, Sarah, asked for a fun, pink/purple manicure and I was all over it.  We had a lot of fun and I think it turned out great.


I started out with two coats of Essie Pilates Hottie (here) on her thumb, index, and middle fingers.  On her ring finger I used two coats of Essie Big Spender (here), and two coats of Essie Loophole (here) on the pinky.  

I then embellished the thumb, index, and middle fingers with two magenta rhinestones each.  The ring finger was stamped with Pueen17 in Konad Pastel Purple, and finally to give the pinky a little sparkle I topped it with two coats of China Glaze Fairy Dust.

Sarah was very pleased with her manicure as was I.  It always helps to get my creative juices flowing when I have someone to design for.

Any specific requests i.e. color palette, motif, or technique?  I'm all ears, Ladies!  Enjoy the holiday tomorrow.

Thursday, February 14, 2013

Happy Valentine's!

I hope that everyone is feeling the love today!  I arrived in North Dakota yesterday to spend some quality time with my nieces and nephews.  They are so sweet and filled with love that I was inspired to create one final Valentine's manicure.


I used Essie Jumpin' Junkanoo on my thumb, middle, and ring fingers.  Essie Fiji on my index finger, with dots in OPI Oy-Another Polish Joke!, OPI Anti-Bleak, Essie Bachelorette Bash, and China Glaze Sugar High.  And finally OPI Oy-Another Polish Joke! on my pinky, topped with one coat of Butter London West End Wonderland over the top for a little extra sparkle.  I wasn't sure how the two golds would mix, as they're quiet different in hue, but I think they make a perfect combination!

Oops, I almost forgot... what Valentine's manicure is complete without a heart or two?  I adorned my ring finger and thumb with a metal heart that I got with this decoration set.  I'm so excited to try more designs with the metal decorations.

Happy Valentine's Day, Darlings!

Monday, February 11, 2013

Stamping Tutorial

As promised here is a stamping tutorial.  With Valentine's quickly approaching it has to include a few hearts, of course!  I discovered stamping a few months ago and have been having so much fun ever since.  The supplies require a bit of up front cost but it's pretty minimal when you consider how much use you'll get out of them.  I purchased this starter kit, which has everything you'll need to get going.


To begin this Valentine's Skittlette manicure I used Essie Blanc on my ring finger, Essie Licorice on my thumb, and a lovely deep red Essie polish that has lost its label on my index, middle, and pinky.

Next up I pulled out all of my necessary supplies. :-)


You'll need an image plate, a scraper, a stamper and polish.  The stamping companies say that you need to purchase their "special polish" to be used for stamping, and while some out there say it is not necessary I have had very little success with using regular polish.  Therefore, I only use the polishes specifically designed for stamping.

Here comes the fun part!  The designs are etched into metal plates, so basically you need to fill the engraved portion of the plate with polish, remove the excess, pick up the design with a stamper and transfer it to your nail.  Here's all of that in more detail...

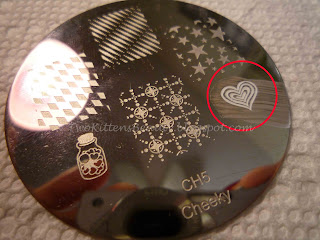
Step 1 - Generously brush stamping polish over the desired design.

Step 2 - Use the scraper to remove excess polish.  (When I first began stamping I was scraping too aggressively and was actually scraping polish out of the design.  Therefore, I wasn't getting a good transfer.  You can see in the photo below there is a small amount of residue left on the plate, don't worry about that because the stamp won't pick up a thin layer of polish.)

Step 3 - Press the stamp down onto the design.  If the design is larger than the heart I am using for this tutorial you may need to roll the stamp over the design.  Do not wiggle the stamp as it will smudge the design.

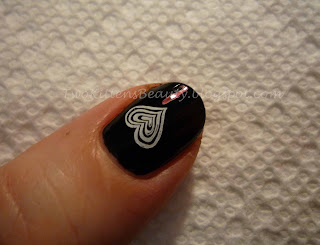
Step 4 - Press or roll the stamp onto your nail, and voila!

Be sure to clean your plate and stamper after each use.  I have found that pure acetone works best for this.  If using a larger stamp you will often get some polish on your cuticles and surrounding skin.  I use a small makeup brush dipped in acetone to clean up.


I finished this manicure with a different stamp on my ring finger, a few red rhinestones on my thumb, and a glitter gradient on my index and middle finger using China Glaze Techno.

Stamp away, Ladies!

Sunday, February 10, 2013

Razzle Dazzle!

I've never been one for glitter polishes but with all of the fun new glitters coming out lately I couldn't help but jump on board.  The new collection Glitz Bitz 'n Pieces from China Glaze has stolen my heart, especially the Razzle Me, Dazzle Me, which has a rosy copper and black glitter pieces in a clear base.  All of the Glitz Bitz 'n Pieces polishes also have bar glitter pieces which I am wild about!


I started by painting all of my nails, except my ring finger, with two coats of China Glaze Magical.  For my ring finger I used OPI Birthday Babe, because I wanted the rosy glitter in the Razzle Me, Dazzle Me to show up!  I used two coats of Razzle Me, Dazzle Me on my ring finger and finished my middle finger with black rhinestones.

This is one of my favorite manicures to date.  What do you think?  Would you like to see more swatches from the Glitz Bitz 'n Pieces collection?

Saturday, February 9, 2013

To Prime or Not to Prime? (pt. 1)

Always prime!  Let's talk eyeshadow primers, which in my opinion are the most important primers of all.  Eyeshadow primers allow better pigmentation of your eyeshadow, prevent creasing, and keep your eye makeup from traveling to places it really doesn't belong. 


The first primer I ever tried was NARS Smudge Proof Eyeshadow Base.  This slick tube comes with a doe foot applicator, which can be seen here.*    I love the texture of the NARS primer, it is very creamy, goes on even and does the job.  The NARS is definitely my favorite primer but it is a bit pricey for the amount of product you get so I do rotate it with other less expensive primers.

*(Despite coming with an applicator I always wipe the product onto my ring finger, share with my other ring finger and gently pat the product all over the upper lid, up to the brow bone and under the eye.  The skin around the eye is very delicate, by using your ring finger to apply product it prevents aggressive pulling of the skin or pressure placed on the eye area.  Excessive pulling of the skin around the eye can cause premature sagging and wrinkles - no one wants that!)

The Original Urban Decay Primer Potion is another one of my go-to primers.  The formula has a nice consistency, is very creamy, and does a great job at preventing creasing and smudging.  The formula is a little on the thick side - I have found that I need to be careful that the primer has been distributed evenly across my lid.  On a few occasions I have ended up with visible smudges of primer on my lid.

My third go-to primer is the Too Faced Shadow Insurance.  Like the others this formula does exactly what it is supposed to do.  The Shadow Insurance is on the thin side, which I actually like as it is easy to distribute evenly across the lid.  I had a previous tube that separated a bit, but I was still able to make it work.  The tube I am currently using has not shown any signs of separation.

Next up is another Urban Decay Primer Potion, this time in Sin, which has a lovely champagne shimmer.  I love to use this primer when I am planning to do a glittery, golden eye makeup.  Like Urban Decay's other primers this one is quite thick and the champagne shimmer is dense.  If I want a dramatic evening eye I can get away with using Sin on its own, however if I want to use it for a day look I mix it with some of the UD Original primer to make the shimmer more subtle.

Last but not least is Too Faced Shadow Insurance Candlelight.  This primer is the perfect marriage of sheer primer with subtle golden shimmer, and like the other Too Faced primer is a bit thinner than others, therefore it goes on even and does the job it's meant to do.

I hope this helps in your priming ventures.  Prime away, Pretties! 

Friday, February 8, 2013

Valentine's Inspiration

Valentine's Day is approaching and it seems you either hate it or you love it.  I love it!  Sadly, Jeff and I are rarely able to spend Valentine's together, as is the case this year, so we are celebrating a week early.


I started this cute manicure by painting my pinky, index finger, and thumb with three coats of China Glaze Something Sweet, topped with two coats of Revlon Girly, which is a milky, semi-sheer lavender with blue, pink, and magenta glitter - so pretty!

Next, I painted my ring finger with Zoya Kelly, a dark slate grey, and my middle finger with Essie Licorice.  Licorice is by far my favorite black polish - it is very easy to apply and offers great coverage in 1-2 coats.

To finish off my ring and middle fingers I used Scotch tape to tape off the point shape, which I then filled with three coats of China Glaze Something Sweet.  Once dry, I removed the tape and used a lavender nail art tape (which can be purchased here) to give the points a clean edge.  This was the first time I used the nail art tape on myself, so it's a bit more rough than I would like it to be, but practice makes perfect.  So don't get frustrated if you struggle at first.

May the next few weeks bring lots of love your way, my dears.  Toodles!

Golden Daisy Manicure

As we trudge through winter we all need a little pick-me-up from time to time.  After a particularly dreary day I thought a fun flowery manicure would help to lift my spirits.


I started by painting my pinky, index, and thumb with Essie Mochachino, which is a beautiful taupe with lots of silvery shimmer.  For my middle finger I used China Glaze Champagne Bubbles, and for my ring finger Essie Licorice.  

Now comes the fun part!  After two coats of Champagne Bubbles I used Pueen 25 nail plate to adorn my middle finger (see image below).  For those who are curious about nail plates I will post a tutorial very soon.  They are so fun!


For my ring finger I used two coats of Licorice followed by a clear top coat.  Be sure to use a normal top coat for this step as it will provide an adequately tacky surface to apply the fimo flower (see image below).  Immediately after applying the top coat place the fimo flower in the desired position and use your nails or a pair of tweezers to conform the flower to the shape of your nail.  The fimo slices have some thickness to them but I have found they will conform to the shape of your nail if held in place for roughly 30 seconds.  Once the top coat is completely dry go over your ring finger only with a matte top coat.  I like Essie Matte About You.


Enjoy the spirit of spring with this fun manicure!  Goodbye for now, Lovelies!

Wednesday, February 6, 2013

Quest for the Perfect Mascara

How many of us have been on an endless quest for the perfect mascara?  One that doesn't clump, flake, run, or irritate -- and is it too much to ask that it also makes our lashes look full, long, curled, and fantastic?  After trying countless mascaras, from Maybelline to Dior,  I've discovered the real truth...  No, there is not ONE mascara that can accomplish all that, however there are several, if used in the right combination, can give you fab lashes! 


Let's start with a primer (and even before that we must start with curling our lashes, sadly there is no substitute for the medieval torture contraption known as an eyelash curler).  As a self-proclaimed Urban Decay lover I was saddened to discover their lash primer goes on uneven and clumpy.  After a bit more searching I discovered Tarte MultiplEYE Clinically-Proven Natural Lash Enhancing Primer, and have not since found a worthy substitute.  The Tarte primer gives my lashes a nice base for colored mascara, and the best part is that it is also helping my natural lashes to grow in thicker and longer!  Pretty awesome, right?

Next is Buxom Lash by Buxom.  To start with I LOVE the wand (see photo below)!  It manages to always pick up the right amount of product.  The wand does a great job of separating my lashes, and depositing just enough mascara on each lash.  This being said Buxom Lash is not going to give you high-impact, va va voom lashes on its own.  I use this mascara over primer, but I usually follow up with another even more impressive mascara such as...


Tarte's Lights, Camera, Lashes!  Tarte's famous mascara gives lashes huge volume, and it stays where you put it.  Need I say more?

My hands-down favorite mascara is Volcanic Minerals Volumizing Mascara by Korres.  Korres claims that this mascara increases lash volume by 600%, and I believe it!  If you really want to pump up the volume on your lashes this is the mascara for you.  The wand (see photo below) is one of the larger that I've ever used, but it is very easy to use and really packs the mascara on your lashes, without clumping, for a fuller than full look, which I love!  I've had a lot of problems in the past with my mascara ending up smudged under my eye less than an hour after applying makeup.  Not only does this mascara stay put for the first hour, it stays put until I wash it off without being difficult to remove.  Way to go, Korres!


They're Real by Benefit is a fairly recent discovery for me.  It was included in the Sephora Lash Stash that I purchased in November.  By December I was sold and bought a full size tube.  The wand (see photo below) is very similar to the Buxom wand however the formula is much thicker and like the Korres mascara, it really packs on a lot of product without clumping.  My only complaint about They're Real is that it tends to end up under my eyes after a long day.  To get around that I use it as the second of three layers of mascara, usually under the Korres.


If like me, you have problems with runny mascara, but would prefer more conservative lashes I highly recommend Blinc mascara.  This mascara uses "tube-technology" to create water-resistant tubes around each lash.  Sound a little crazy?  It is!  Blinc mascara really does stay put all day long - not a single flake or smudge, but as you wash it off you can actually see tiny tubes in the sink.

I hope this helps in your quest for the perfect mascara, or combination of mascaras.  Toodles for now!

Tuesday, February 5, 2013

Welcome!

I have loved makeup and nail polish since I was a little girl, but I just became passionate about it in the last few years.  I am having so much fun trying new products and techniques that I want to share my excitement with friends, family, and anyone looking for inspiration.  Enjoy!

Two Kittens Polka Dots


I started out with two coats of OPI Russian Navy, which is a beautiful deep navy blue with a hint of pink shimmer.  Next, I used a dotting tool to place dots of Lancome Jolie Rosalie (311M) over the navy blue base.  Finally, I adorned my ring finger nail with small pink rhinestones and one clear heart rhinestone.

This is a super-cute, flirty and feminine manicure that can be recreated using any color combination that floats your boat.

Oh, and thanks to my amazing kittens, Coraline and Wednesday, for being so darn cute that they inspired my blog name. :-)