I can't count the number of times I have seen a new nail technique online and thought, "Why didn't I come up with that?" Moments of brilliance are rare, but I am proud to announce that I had such a moment a few days ago!
Here's the result of my light bulb moment:
***Disclaimer: this manicure is not up to my standards, however I am one of those people that lacks patience. I was so excited to post this tutorial that I decided to put my perfectionism aside this time.***
Before I get into the tutorial let's first back track a bit... The Aztec nail trend has been a frustrating one for me. I have tried numerous times to free hand the intricate designs. I've tried using striping tape, scotch tape, striping brushes, and toothpicks, only to create an embarrassingly messy manicure that I wouldn't even show to my best friend.
Since I've been in New Mexico without all of my fancy nail art supplies I've had to be creative with what I do have AND I've had the opportunity to try out some techniques using household items that I was always too busy to try. One such technique is do-it-yourself nail decals, created using a Ziploc bag and nail polish. This tutorial on Gnarly Gnails is a great step-by-step post on creating your own nails decals, the only difference is that she uses wax paper instead of plastic.
My next thought on how to create an Aztec manicure was to paint my nails with a base coat and create a collage using small pieces of dried polish which I would adhere to my nails using a touch of polish. This technique was a step in the right direction, but I was still dissatisfied with the results.
And then it hit me! Why not create my own nail wraps? I would have the ability to use both of my hands to create them, I wouldn't have to worry about messing up wet polish, and my lack of ambidextrousness wouldn't be an issue! Light bulb moment!
Supplies:
- nail polish (duh!)
- Ziploc or comparable bag.
- fine tip Sharpie
- Scotch tape
- X-acto knife
- tweezers
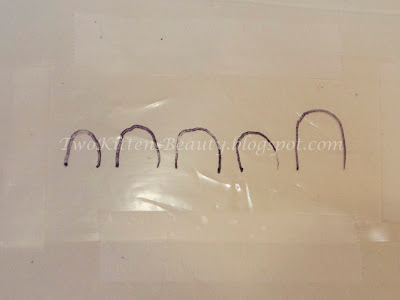
1) Wrap the Ziplock bag around each finger and trace the cuticle of each nail. This will give you guide lines for creating the correct shape, width, and length wrap for each nail. Cut out the set of guides and tape down to a flat surface with the side you drew on down,
being careful to pull out any large wrinkles in the plastic.
2) Paint 2-3 coats of your base coat onto the plastic. Stay within the lines on the top and sides but paint a bit extra at the end to allow for extra length.
3) Paint squares of polish onto a different piece of Ziploc bag. Allow ample drying time. Peel from plastic. (In order to save time this can be done up to 36 hours beforehand.)
4) Cut shapes out of the squares of polish and place them onto each nail wrap in the desired location. (When I did this the base coat was still a bit tacky, therefore I was able to place each piece without the need for wet polish to act as a bonder.) Once all of your shapes have been placed paint each wrap with a thin layer of quick drying top coat.
5) Once the top coat has dried use a fine point Sharpie to draw your black lines and dots.
6) Now comes the fun part! Peel up your nails wraps and think, "Holy sh**! It worked!"
7) To apply paint a thin layer of base coat onto a nail and press the corresponding wrap onto your nail. Use a file to remove excess length and top with a coat of quick dry top coat.
I still think my Aztec nails need a bit of work, but they are certainly better than any other attempt I've made, and considering this is my first attempt at creating my own nail wraps I am super pleased with the way they turned out. What do you think?
Thanks for reading. Toodles!


